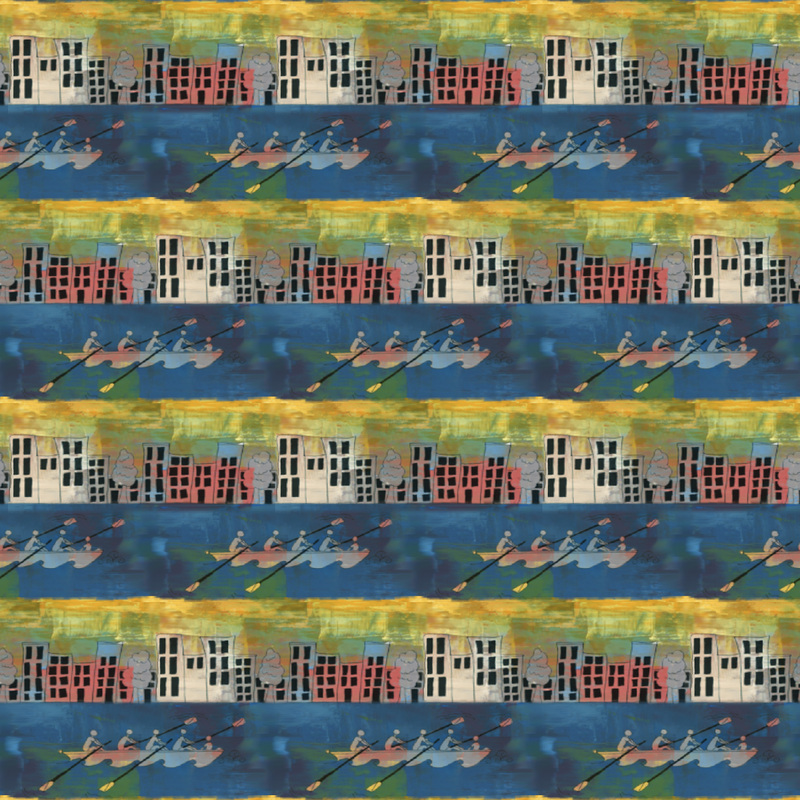
Edited Crew image - original by C Bronsky
- Begin with original image.
- Make several copies and lock the bottom image so you have a block to crop the image back to.
- Resize the canvas so 50 to 100 pixels of space surround on all sides.
- Place a copy of the central image on both the right side and the left side.
- Deform the central image to square up the horizontal band of water. I used the distort tool as opposed to simple skewing. Once you square up the image, replace the left image with a copy of the center image.
- There will now be "too much" sky above due to the skewing. You will eliminate that later.
- Move the left and right images inward to overlap the central image so the buildings have no gap between them/
- Use a blurring or smudging tool on the left and right images to create a blend effect over the central image and erase to make building edges line up.
- Flatten the three images together and finish blending and smudging where they meet.
- Repeat with the top and bottom edges using copies of the flattened, three-image montage.
- Locate the locked original copy under the changes and crop the document to that original.
- You will now have a nearly seamless repeat.
- Repeat process as needed with new image to get blends at edges right.
- To create slipping, I tiled the image on a larger space, flattened it, and cut out the middle row.
- I then pasted two copies of the middle, joining their ends together and placed them to offset the design.
- There was a little roughness at the point where the buildings met the water. I created a long 50 pixel high rectangle to cover the width of the page and applied the image as a pattern which I could shift up and down in the rectangle to get a good yellow/blue event horizon. I feathered the edges to create a blend effect and smooth the transition between the houses and water, and the sky and water.
- Below is the final version.